Payload Transformer
It resembles an API response but includes an output. We generate customized data through data mapping, employing it as input for subsequent nodes.
info
When we want to get a variable from the pipeline, we use $ sign as prefix followed by Variable name in the pipeline. They can be nested which are seperated by "." Ex. $Payload.key
Note: The variable Payload should be present in the pipeline before getting it.
Configuration
- Drag and drop PAYLOAD Transformer from the pallet.
- Left click on transformer, now you can define the PAYLOAD Transformer configuration.
- Provide the Output variable. The output variable stores the result of the transformation.
Mapping Types
| Fields | Description |
|---|---|
| GEN | Get one field from the input and mapped in another field of output |
| TRANS | Transforms the input value with the help of inline transformation functions |
| OBJ | Creates a object with target name as key |
| AR | Mapped the input into an array |
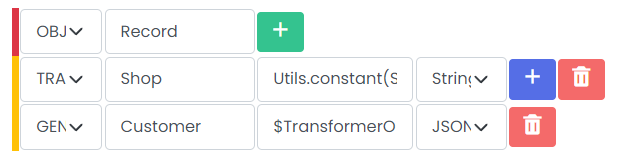
1. TRANS
- From Dropdown select TRANS - Transforms the Input value with the help of inline transformation functions.
- Click on the add button. You will see Inline functions, click on + icon.
- Select
UtilsandConstantfrom dropdown. Add Parameters as Active and Save. - The configuration of the APIRESPONSE Transformer appears as follows:
- Target - In target write Status and you will find Key as below
- Key - Utils.constant(Active)
2. AR
From Dropdown select AR - Mapped the input into an array.
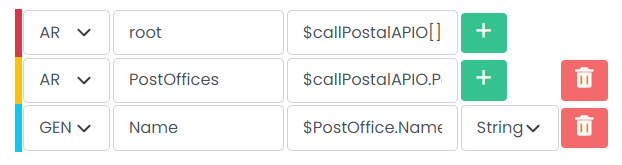
3. GEN
From Dropdown select GEN - Get one field from the input and mapped in another field of output.

4. OBJ
From Dropdown select OBJ - Creates a object with target name as key.
Mapping view
View response structure side by side as you create mapping.
Input Mapping (Autofill)
1. Swagger
- Upload/Create the swagger on Define / Swagger page.
- Select swagger radio button and swagger name from dropdown.
- Click on view swagger button that will appear on right hand side of dropdown.
- Hover over the endpoint which has
Request Bodyand copy icon will appear on right hand side. - Click on copy icon to map input configurations.
2. Schema
- Create the schema on Define / Schema Design page.
- Select schema radio button and schema name from dropdown.